| Event receiver | Workflows |
| 1) Event receivers in SharePoint can be executed before or after an operation, like before adding an item or after adding an item. | 1) workflows can be executed only after the operation happed like after an item added to the list or after an item update. |
| 2) The event receivers in SharePoint 2013 or event receivers in SharePoint 2016 cannot be launched manually. They always attached to a SharePoint object which will run automatically when the event occurs. | 2) workflows can be started automatically as well as can be started manually also. |
| 3) You can cancel the operation like adding an item | 3) You cannot cancel the action as the item is already added. |
| 4) You can create an event receiver only in Visual Studio | 4) You can use any tool like SharePoint designer, Visual Studio, Visio, 3rd party apps, etc. |
| 5) No UI interaction | 5) Can use forms like initiation form, association form, etc. |
| 6) Can be run for a very short period of time. | 6) Can run for days, weeks or even years. |
| 7) Will not survive after server reboots | 7) Will survive after server reboots |
Monday, June 8, 2020
Difference between event receiver and workflow?
Ans
What are Event Receivers ans its types?
Ans
The event receiver is simply a method that is called when a triggering action occurs on a specified SharePoint object.
Two types of event receivers:
a) Synchronous: Events are executed before the action is executed on the content database.
b) Asynchronous: Events are executed after the action is executed on the content database.
What is the difference between SharePoint Online and SharePoint On-premise?
Ans
| Online | On-premise |
| 1) No need of hardware to buy. All updates and patches are taken care by Microsoft | 1) Resource requirement: you need more resources to maintain the server, to add updates and patches. This means a requirement of more people and hardware. |
| 2) Information stored in the cloud | 2) Information lies in your local environment |
| 3) Cost is less and is billed monthly per user. | 3) Cost is more as it requires more resources, hardware, and maintenance |
| 4) Powershell control is reduced as compared to on-premise. | 4) More PowerShell control |
What is the difference between Sharepoint-hosted apps and Provider-hosted apps?
Ans
| Sharepoint-hosted apps | Provider-hosted apps |
| No server-side code, 100% client-side code | Server-side coding is used. Managed code and high trust |
| Can be developed using HTML5, CSS, JavaScript, jQuery, ASP.NET Ajax, CSOM, REST API, Silverlight, KnockOut JS, Angular JS | Any programming language can be used |
| Data Storage Locations: SharePoint Online, Content Database | Data Storage Locations: ISV Storage, Azure Storage, Content Database. |
| Can be hosted on either SharePoint on-premises or office 365 | Deployed outside the SharePoint farm |
What is App-model in SharePoint and its types?
Ans
Sharepoint apps are also called as SharePoint add-in. A SharePoint Add-in is a self-contained piece of functionality that extends the capabilities of SharePoint websites to solve a well-defined business problem.
There are two types of SharePoint Add-in
- SharePoint hosted apps
- Provider-hosted apps
SharePoint Hosted App
SharePoint hosted apps are those apps, where all the components are hosted on SharePoint only.
SharePoint-hosted apps are installed on a SharePoint website, called the host web. They have their resources hosted on an isolated subsite of a host web, called the app web.
Provider Hosted App
Provider-hosted apps for SharePoint include components that are deployed and hosted outside the SharePoint farm.
They are installed to the host web, but their remote components are hosted on another server. i.e. App web for provider hosted apps is completely a different server (provider).
What is the SharePoint Document Library?
Ans
A document library allows users to easily store, upload, share, collaborate, and track documents or files. Similar to lists, we can create columns in a document library which represents the metadata for the uploaded documents.
What is SharePoint List?
Ans
SharePoint list is a collection of records related to an entity. These records in the list are termed as items. SharePoint list provides a feature to add a different type of fields which are termed as list columns.
What is a Content type?
Ans
According to Microsoft, A content type is a reusable collection of metadata (columns), workflow, behavior, and other settings for a category of items or documents in a SharePoint list or document library. Content types enable you to manage the settings for a category of information in a centralized, reusable way.
What is Site Column?
Ans
According to Microsoft, “A site column is a reusable column definition, or template, that you can assign to multiple lists across multiple SharePoint sites. Site columns are useful if your organization wants to establish some consistent settings across lists and libraries.”
Difference between list and library in SharePoint?
Ans
Lists:
Can have attachments
Have major versions only
Do not have Check-in/Check-out features
Libraries:
Cannot have attachments (files are directly in the library)
Have both minor (draft) and major (published) versioning
Have Check-in/Check-Out
How to add custom .css and .js file in SharePoint master page?
Ans
If you just want to add a custom CSS and JS to your master page, then instead of creating a new master page, try the following and check if it works for your purpose.
For Custom CSS : Use the Alternate CSS Url to set a custom CSS File.
Upload your custom CSS file to Style Library or Site Assets
Go to site setting > Look and Feel > Design Manager > Publish and Apply Design > Assign Master Page based on device channel .

At Alternate CSS URL > Specify a CSS file to be used by this site and all sites that inherit from it: > Browse your file.
Check Reset all subsites to inherit this alternate CSS URL if you need to apply this for all Subsite.

or
<SharePoint:CssRegistration ID="CSSCustom" Name="<% $SPUrl:~sitecollection/SiteAssets/css/FileName.css %>" runat="server" After="Themable/corev15.css"/>
For referring a custom JS file follow this approach -
You can upload your JavaScript file in the Style Library and use the SharePoint:Scriptlink tag in Master Page to load it.
For example:
If you have a js file called YourScriptName.js. Goto Site Contents -> Style Library, create a folder for your custom scripts to lie, and upload the one which you want to use.
Then open up your master page and in the header section add a Scriptlink tag to load the js file.
<SharePoint:Scriptlink ID="Scriptlink9" runat="server" name="~SiteCollection/Style Library/YourFolderName/YourScriptName.js" language="javscript" />
The above tag goes in Master Page.
How to Customize List View in SharePoint Online using JSLink?
Ans
JSLink is a new approach combining JavaScript, HTML and CSS elements to customize the look of a SharePoint list views, list forms, and can control the rendering of fields. JSLink was introduced in SharePoint 2013.
The power of using JSLink is that it uses JavaScript and runs in the client and you can use all the powerful JavaScript libraries and for its easy to debug.
In this example, we are going to customize view of task list. Task list has default column with internal name PercentComplete. This column stores %age task completion, we will add conditional formatting to this column.
Default View:

Final View:

Steps to do it?
Step 1: Create a JavaScript code file to override default view
Step 2: Upload JavaScript file to Master Page Gallery –> Display Templates folder
Step 3: Set JS Link Property of List view web part to Url of uploaded JavaScript file.
Step 1: Create a JavaScript code file to override default view
In the first step, we need to develop the JavaScript code file that will contain the customization logic.
Simple example:
The following code shows a simple function that will display description field in the list in italics.
(function () {
var overrideCtx = {};
overrideCtx.Templates = {};
overrideCtx.Templates.Fields = {‘Description’: { ‘View’: ‘<i><#=ctx.currentItem.Description#></i>’ }
};
SPClientTemplates.TemplateManager.RegisterTemplateOverrides(overrideCtx);
})();
overrideCtx variable holds the current context of the list item.
Templates.Fields property provides access to individual list fields.
RegisterTemplateOverrides function call registers the templates for your list to use.
Main Code to customize PercentComplete column in task list
CustomizeTaskCompletionView.js
(function () {
// Initialize variable that will store overrides objects.
var overrideCtx = {};
overrideCtx.Templates = {};
overrideCtx.Templates.Header = “”;
overrideCtx.Templates.Footer = “”;
overrideCtx.Templates.Fields = { ‘PercentComplete’: { ‘View’: CustomProgressBar } };
// Register template overrides.
SPClientTemplates.TemplateManager.RegisterTemplateOverrides(overrideCtx); })();
function CustomProgressBar(ctx) {
var percentage = ctx.CurrentItem.PercentComplete;
var percentageNr = ctx.CurrentItem.PercentComplete.replace(” %”, “”);
var duedate = new Date(ctx.CurrentItem.DueDate);
var color = getCompletion(percentageNr, duedate);
return “<div style=\”background: #F3F3F3; display:block; height: 15px; width: 120px;\”><div style=\”background: ” + color + “; height: 100%; width: ” + percentageNr + “%;\”></div></div> ” + percentage + “”;
}
function getCompletion(progress, duedate) {
var datenow = new Date();
if (parseInt(progress) < 100 && duedate.getTime() < datenow.getTime())
return “Red”;
else
return “Green”;
}
Step 2: Upload JavaScript file to Master Page Gallery à Display Templates folder
Navigate to Site Settings –> Master Pages and page layouts –> Display templates folder

Upload JavaScript file CustomizeTaskCompletionView.js created in step 1 to this folder.

Content type –> JavaScript Display Template
Target Control Type –> View
Standalone –> Override
Target Scope –> /

Step 3: Set JS Link Property of List view web part to Url of uploaded JavaScript file.
Navigate to Task list and edit list view WebPart, I have opened Workflow Tasks list

You will see JSLink property under Miscellaneous section

If JSLink property is missing, In Office 365, go to your SharePoint Admin Center –> Settings and enable custom script.
It may take upto 24 hours before you start seeing JSLink property once you enable it.
Once property is visible, provide uploaded JavaScript URL. We cannot give absolute path, we will have to use site collection token representation like this:
~sitecollection/_catalogs/masterpage/Display Templates/CustomizeTaskCompletionView.js
~sitecollection The URL of the parent site collection of the current website.
Save changes and add new task to this list. It will look like this:

Friday, June 5, 2020
What are Webparts and Webpart Zones?
Ans
WebParts
Web Parts are self-contained packages of user interface that can be dropped onto a SharePoint Web Part page to provide discrete set of functionality to the users. They can simply be described as re-usable Code units.
Webpart Zones
Web part zones are what your web parts reside in. Each webpart zone can contain number of webparts and can be positioned in a specific way to create a webpart Layout Page.
What are Master pages and Page layout in SharePoint?
Ans
Master page
These are the pages that provide a consistent layout and appearance (look and feel) for SharePoint sites. A master Page consist of a Site logo, Top navigation, left navigation(some cases) and a footer. In SharePoint Master Pages are stored in _catalogs folder or Master Page Gallery from UI.
Page layout
A Layout page defines the Layouts(structure including Webpart zones) of a content page in SharePoint. Layout pages are not same as Master Page. A Layout Page is contained inside the content area surrounded by mater Page.
What are Application Pages, Site Pages and Content Pages?
Ans
Application Pages - An application page is deployed once per Web server and cannot be customized on a site-by-site basis. They stay in 12 hive folder structure, mostly under layouts folder.
Site Pages - These are pages that make up the site interface and are specific to one site or site collection.They mostly get stored in the content database of the site collection.
Content Pages - Site Page which contains webpart or other custom components. This Page is stored in database. They mostly get stored in the content database of the site collection.
What is a Site definition and Site Template?
Ans
Site definition
A Site definition is a collection of Files such as ONET.XML which defines the Site template for e.g. Team Sites used to create a Site in SharePoit. All the out-of-box site Templates like Blog,Wiki,Team Site etc can be found in C:\Program Files\Common Files\Microsoft Shared\web server extensions\12\TEMPLATE\
Site Template
Any Site along with the content can be saved as a template. If a site is saved as a Template it is stored in Site templates folder as a .stp file. This template is then re-used to create a new site which will have the pre-saved settings.
Can we create Web Application in SharePoint Online?
Ans
We are able to create several site collection in SharePoint online and change its configuration but we can’t make any web application or change web application setting for your existing site collections.
What is the difference between Authentication and Authorization in SharePoint?
Ans
Authentication is the process by which the identity of a user who requests access to a SharePoint web application is verified.
Authorization, which is the process by which a user is granted access to specific resources within a SharePoint site.
Simply put, Authentication controls whether or not a user has permission to access sites on a SharePoint web application. Authorization controls what documents, lists, libraries, etc. a user can access on a SharePoint site once they have been successfully authenticated.
SharePoint 2013 supports the following authentication types:
- Windows authentication
- Forms-based authentication
- SAML token-based authentication
Why we should go for SharePoint framework or its benefits?
Ans
- It runs in the user context so only the allowable data content will be displayed to an end-user.
- It is light-weight, fast and responsive as SPFx is completely a client side and uses NodeJS. It is compatible with the Office Fabric UI components and becomes responsive.
- When the server-side solutions are not used wisely, they might cause a damage from a site collection to an entire SharePoint farm. One can mitigate this risk using the client-side development which is supported by the SPFx.
- If one’s online tenant is either running on the old SharePoint 2013 classic mode or upgraded to latest tenant feature, then one can have a back seat and relaxed as the SPFx is compatible with both the modern as well as classic pages.
- In the erstwhile client-side code, one is required to use some extra variables and make some calls for fetching the configurations. Now, this becomes very convenient to use with the SPFx as one can assign the properties of a custom client-side web-parts and configure it accordingly.
- The SPFx provisions its own deployment mechanism which includes the app bundling, the app packaging, the app shipping to store (or to local SharePoint App Catalog) and deployment in the tenant with the proper permission. The whole process is managed in better way for the client-side web parts.
- If one is not having internet connection, then also one can develop on the SPFx coming with a local workbench which is effective in developing and testing of a client-side web-parts.
- It is scalable as not being limited to SharePoint. One can use NodeJS and other component available in NodeJS community in the SPFx client-side development. A client-side web part can be made to interact with Office365, Azure, One Drive, Outlook, etc. with the Microsoft Graph API development.
- No specific machine related requirement is necessary for the development. One can use any machine-like Windows, Mac or Linux for the client-side development. The only necessity is to set-up the development environment through NodeJS, Gulp and Yeoman template installation of the framework. To develop SPFx web-parts, one is simply required having any text editor.
- The business logic or code of a client-side web-part is secured as it can’t be accessed from the page source or browser inspect.
How to deploy the spfx webpart?
Ans Steps of deployment of SPFx solution in SharePoint page


- Launch the console window and set console path to our SPFx web part directory. If Yeoman server is running on a console you have to stop it by Ctrl+C command followed by Y.
- gulp clean command: This command clean the project deployment file .sppkg which is present in folder sharepoint under project directory and also creates debug solution file.
- gulp bundle –ship command: This command help to create minified files for build the solution and also generate debug bundle under dest folder. This builds the minified assets required to upload to the CDN provider. The minified assets can be found under the temp\deploy directory.
- gulp package-solution –ship command: This creates the updated client-side solution package in the sharepoint\solution folder. Created file: sharepoint\solution\ms-hello-world.sppkg
- Now upload or drag an drop solution package file from sharepoint\solution\ms-hello-world.sppkg to App for sharePoint library in app catalog site.

- Once our SPFx web part package has finished uploading, we will be prompted with a dialog window to complete the deployment. This is where you will choose whether to deploy to all sites within your tenant or to all subsites within your site collection. Make your selection and then click the Deploy button.

- We have deploy our Hello World SPFx web part. Now we need to add it on modern SharePoint site page.

- From + Add a new web part icon we select our WP Hello World web part and save it.

Note: In case we did not select “Make this solution available to all sites in the organization”, we would first have to add SPFx web part to respective site and then we add on page.
On SPFx web part creation SharePoint Youmen Generator will ask “if you would like to allow the tenant admin the ability to deploy the solution to all sites.” If we say Y yes then skipFeatureDeployment property set to true in the package-solution.json file. We also manually set this property from package-solution.json file.

How we can use SharePoint framework client side webpart in classic pages?
Ans


Add SharePoint framework client web part to classic web part page
First, we need to add the SharePoint framework client web part to the SharePoint classic site.
Open the SharePoint site and then click on the Settings icon and then Add an app.
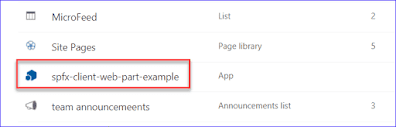
You can see the spfx client-side web part in the site content. Click on the web part to add the web part to the SharePoint classic site.
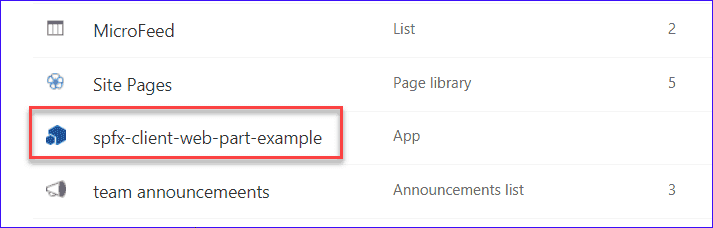
Once the client-side web part added successfully, Open a web part page and click on Add a web part. Then you can see in the Other web part category, you can see the spfx client-side web part.

Once you add the sharepoint framework client web part to the SharePoint classic web part page, it looks like below:

What is Redux?
Ans
- Redux is a predictable state container for JavaScript applications.
- It helps you write applications that behave consistently, run in different environments (client, server, and native), and are easy to test.
- Simply put, Redux is a state management tool. While it’s mostly used with React, it can be used with any other JavaScript framework or library.
- It is lightweight at 2KB (including dependencies), so you don’t have to worry about it making your application’s asset size bigger.
- With Redux, the state of your application is kept in a store, and each component can access any state that it needs from this store.
Thursday, June 4, 2020
What is the difference between local workbench and Actual site workbench?
Ans

A Workbench is a tool where the developer can host and test their SharePoint Framework solution.
The Workbench is reactive and will automatically reload artifacts when the developer saves a file so that developers can see and test the solution quickly.
There are two versions of the Workbench.
1) Hosted outside SharePoint
2) Hosted inside SharePoint
- One is outside of SharePoint, hosted locally on the development machine that runs offline without SharePoint access and SharePoint data.
- This allows the team and designers to build and design solutions with mock or fake data to focus on the user interface.
- This enables us to quickly test the web part without deploying in SharePoint.
- This includes the client-side page and the client-side canvas in which we can add, delete, and test our web part in the development phase.
- When we execute the “gulp serve” command the local workbench starts. This command executes a series of gulp tasks to create a local, node-based HTTPS server on localhost:4321 and launches our default browser to test web parts from our local dev environment.
- https://localhost:4321/temp/workbench.html -This HTML page is served from the local file system by Node.js and is loaded in the browser.

The second version is hosted inside SharePoint and is used when we need to test and verify the SharePoint Framework solution by using real SharePoint data and context.
URL - (Our site URL)/_layouts/15/workbench.aspx
How you handle multiple textbox values on single handler in react js?
Ans
You can control the values of more than one input field by adding a name attribute to each element.
When you initialize the state in the constructor, use the field names.
To access the fields in the event handler use the event.target.name and event.target.value syntax.
To update the state in the this.setState method, use square brackets [bracket notation] around the property name.
class MyForm extends React.Component {
constructor(props) {
super(props);
this.state = {
username: '',
age: null,
};
}
myChangeHandler = (event) => {
let nam = event.target.name;
let val = event.target.value;
this.setState({[nam]: val});
}
render() {
return (
<form>
<h1>Hello {this.state.username} {this.state.age}</h1>
<p>Enter your name:</p>
<input
type='text'
name='username'
onChange={this.myChangeHandler}
/>
<p>Enter your age:</p>
<input
type='text'
name='age'
onChange={this.myChangeHandler}
/>
</form>
);
}
}
ReactDOM.render(<MyForm />, document.getElementById('root'));
How we can get current site url in Sharepoint framework?
Ans To get the URL of my SharePoint site.
this.context.pageContext.site.absoluteUrl
Why we use constructor() and super() in class?
Ans
constructor()
- The constructor is a method that’s automatically called during the creation of an object from a class.
- It can be used to bind event handlers to the component.
- It can be used for initializing the local state of the component.
- The constructor() method is fired before the component is mounted.
- When you call the super() method, it calls the constructor of the parent class which in the case of a React component is React.Component
super()
super() is called inside a react component only if it has a constructor. For example, the below code doesn't require super:
class App extends React.component {
render(){
return <div>Hello { this.props.world }</div>;
}
}
However if we have a constructor then super() is mandatory:
class App extends React.component {
constructor(){
console.log(this) //Error: 'this' is not allowed before super()
}
}
The reason why this cannot be allowed before super() is because this is uninitialized if super() is not called. However even if we are not using this we need a super() inside a constructor because ES6 class constructors MUST call super if they are subclasses. Thus, you have to call super() as long as you have a constructor. (But a subclass does not have to have a constructor).
We call super(props) inside the constructor if we have to use this.props, for example:
class App extends React.component{
constructor(props){
super(props);
console.log(this.props); // prints out whatever is inside props
}
}
What is props and state in react
Ans:
Props
Props
- The props are read-only properties we set values to when we call our React component.
- They are a way to transfer information from the parent component to the child.
- We can also use them in your React component to control how it behaves in different situations – when different kind of data is passed down to it.
State
- The state can also be used for controlling, e.g., how our component is rendered.
- What makes state different from props is that we can change its values.
- We typically initialize state with null values in the constructor and later change the values when something happens in the component to reflect that change – the new state of the component.
Remember when render() method is executed whenever the props or state changes? we can change the state by calling the this.setState() method, and that will make our render method execute again, taking into account the new state values. There is also another way to set state: this.state = { ... } but that should only be used in the constructor as it does not trigger the render method execution.
Friday, May 29, 2020
Difference between Functional and Class Components in react.js ?
| Functional component | Class Component |
| 1.A functional component is just a plain JavaScript function which accepts props as an argument and returns a React element. | 1.A class component requires you to extend from React.Component and create a render function which returns a React element. This requires more code |
| 2. you cannot use setState() in your component. | 2.you can use setState() in your component. |
| 3. It contains less lines of code | 3. It contains more lines of codes |
| 4. It accepts only props | 4. It accepts both props and state |
| 5. syntax import React from 'react'; import ReactDOM from 'react-dom'; function Welcome(props){ return <h1>Hello,{props.name}</h1> } ReactDOM.render(<Welcome />,document.getElementById('root')); | 5. syntax import React from 'react'; import ReactDOM from 'react-dom'; class Welcome extends React.Component{ render(){ return <h1>Hello,{this.props.name}</h1> } } ReactDOM.render(<Welcome />,document.getElementById('root')); |
What is folder structure of SharePoint Framework (spfx) webpart and what are the main files used in it.
Ans:-
Folders in Solution

src
- The code files are stored inside this folder
- Includes web part code file (HelloWorldWebPart.ts),
configuration JSON file (HelloWorldWebPart.manifest.json)
lib
- It contains processed code which can be bundled and
distributed
- All TypeScript files compiled to JavaScript files are
stored in this folder
dist
- Contains final distributed files
- Includes JavaScript bundle file –
HelloWorldWebPart.bundle.js
config
- Contains a set of JSON files for configuration
- Configuration files vary from bundling to packaging
node_modules
- Contains JavaScript modules downloaded by Node.js
typings
- Contains TypeScript typings files for various libraries
- Typings supports IntelliSense for JavaScript libraries
SharePoint
- Contains the final .spapp file post execution of ‘gulp
package-solution’ command
Major
Files in Solution
Web Part Class
(HelloWorldWebPart.ts)
This defines the entry point of the
web part. In our solution, we have only one web part class -
HelloWorldWebPart.ts located at src\webparts\helloWorld folder. The web part
class extends BaseClientSideWebPart. Each client-side web part should extend
from BaseClientSideWebPart, which provides basic functioning for the web part.
Property Type Interface (IHelloWorldWebPartProps.ts)
The interface resides in the same web part file. The web part class accepts
the property type of interface. This interface is used to define our own custom
properties for the web part. We can add any of the below type of properties.
- Button
- Checkbox
- Choice group
- Dropdown
- Horizontal rule
- Label
- Link
- Slider
- Textbox
- Multi-line Textbox
- Toggle
- Custom
The properties can be used in web
part as below.
- <p class="${ styles.description }">${escape(this.properties.description)}</p>
WebPart Manifest
HelloWorldWebPart.manifest.json
holds the metadata of web part such as display name, description, icon,
version, id.

Config.json
The configuration file contains the bundling information, the
components used in the solution and entry point of the solution.
This file also records the external references (for e.g.
jQuery) and its dependencies. Also, references to localization resources are
stored in this file.

deploy-azure-storage.json
This file is used while deploying the client-side web part to
Azure CDN. This file contains Azure storage account details.

package-solution.json
This file contains solution path configurations.

gulpfile.js
Defines gulp tasks to run.
package.json
Defines JavaScript library dependencies.
tsconfig.json
Defines settings for TypeScript compilation
Summary
Yeoman generators help to generate SPFx client-side web part
solution. The solution has a predefined structure. Each folder and file has its
own significance. It is important to understand the role of each file for
better development.
Thursday, May 28, 2020
What are steps to configure SharePoint framework?
Ans:-
Step 1 - Download and Install Node JS LTS Version 10
Step 2 - Installing Visual Studio Code
We can use any code editor to develop SPFx solution but mostly it's used in Visual Studio code. Download Visual Studio code stable version from the below link.
https://code.visualstudio.com/ -
Step 3 - Install Yeoman and Gulp
- These are Node JS based tools which help in creating, building, and debugging SPFx solutions.
- Go to Node JS command prompt
- Enter the below command
- It will download yeoman and gulp packages, we are using -g parameter so that it would be installed globally across your Node JS environment.
Step 4 - Install SharePoint Yeoman generator.
- Next, we will install the SharePoint Yoeman generator which will help in creating the SPFx solution project structure.
- Run the below command in Node JS command prompt.
npm install -g @microsoft/generator-sharepoint
Step 5 - Trusting self-signed Developer certificate
SharePoint local server to test web parts uses HTTPS. This is developed using a self-signed developer certificate. So we need to trust the self-signed developer certificate for our development environment.
This needs to be done only once, but it would need to run on SPFx project root folder. So you can do this once we create our first Hello world client-side web part
- Run the below command in Node JS command prompt.
gulp trust-dev-cert
Step 6 - Create Hello World Web part
- Go to Node JS command prompt, go to the required path where you wanted to create the SPFx project.
- Use 'md helloworld-webpart' command to create a directory and go to that directory using 'cd helloworld-webpart'
- Once in your folder, use below command to create a new SPFx project
- yo @microsoft/sharepoint
- It will take you to some questions one by one to create a required project based on your requirements.
- Now let's run 'gulp trust-dev-cert', you will be asked to install a certificate. Click yes
Step 7 - Preview web part in local workbench.
- Run the below command.
gulp serve
- It should open local workbench like below, click on Add icon and add Hello world web part to the page.
What is the life cycle of SharePoint framework?
Ans:- Once SPFx is loaded, it starts to initialize all the web parts on the page, indicated by the OnInit() event. Then when it's time to paint the web part on the page, the render() method is called.
- OnInit()
- render()
What is SharePoint client side webpart?
Ans:- Client-side web parts are client-side components that run inside the context of a SharePoint page. Client-side web parts can be deployed to SharePoint Online, and you can also use modern JavaScript tools and libraries to build them.
Client-side web parts support:
- Building with HTML and JavaScript.
- Both SharePoint Online and on-premises environments
What is SharePoint Framework(spfx) and its key features?
Ans:- The SharePoint Framework (SPFx) is a page and web part model that provides full support for client-side SharePoint development, easy integration with SharePoint data, and support for open source tooling. With the SharePoint Framework, you can use modern web technologies and tools in your preferred development environment to build productive experiences and apps that are responsive and mobile-ready from day one. The SharePoint Framework works for SharePoint Online and also for on-premises (SharePoint 2016 Feature Pack 2 and SharePoint 2019).
Key features of the SharePoint Framework include the following:
- It runs in the context of the current user and connection in the browser. There are no iFrames for the customization (JavaScript is embedded directly to the page).
- The controls are rendered in the normal page DOM.
- The controls are responsive and accessible by nature.
- It enables the developer to access the lifecycle in addition to render, load, serialize and deserialize, configuration changes, and more.
- It is framework-agnostic. You can use any JavaScript framework that you like: React, Handlebars, Knockout, Angular, and more.
- The toolchain is based on common open source client development tools such as npm, TypeScript, Yeoman, webpack, and gulp.
- Performance is reliable.
- End users can use SPFx client-side solutions that are approved by the tenant administrators (or their delegates) on all sites, including self-service team, group, or personal sites.
- SPFx web parts can be added to both classic and modern pages.
Monday, May 18, 2020
What is Team and Communication site?
Ans:- Modern SharePoint sites come in two variants,
- Team Site
- Communication site.
A Team site is really more for a group of people to collaborate, share documents, track events, manage tasks.
A Communication site to share important information within your organization, keep track of topics, events or projects. Communication site provides three templates:-
- Topic,
- Showcase,
- Blank.
Classic SharePoint vs Modern SharePoint?
Ans:- Classic
SharePoint vs Modern SharePoint
|
Key Feature |
Classic SharePoint |
Modern SharePoint |
|
Custom
master page and page layouts |
Classic
SharePoint we able to set custom master page and page layouts by Out of Box
SharePoint. |
Modern
SharePoint does not support any custom master page and page layouts. Modern
SharePoint as its own layouts that fully responsive including all modern web parts. |
|
Responsiveness |
Classic
SharePoint is partially responsive including all classic web part. Classic
SharePoint is not mobile friendly. |
Modern
SharePoint comes with full responsiveness even all modern web parts. Modern
SharePoint comes with Team sites, modern list and library structure and
site pages. Modern SharePoint support all modern devices including mobiles,
tablets and surface devices. |
|
Secure
and Faster |
In Classic SharePoint
user have permission to add custom code (javascript), also have script editor
and content editor web part that render on the server side that’s why it
takes time to load on the browser with additional security issues. The user can also edit
pages in SharePoint designer. |
Modern SharePoint doesn’t allow any custom code even it does
not provide any script editor web part for custom code that’s why is more
secure and loads faster. |
|
List and Library improvements |
Classic SharePoint list and library level configuration are
most complicated task there is no easy interaction with these controls.
Classic SharePoint has ribbon containing all list and library configuration. |
Modern SharePoint has
many lists and library level improvements including easier filtering,
conditional formatting, and attention views, which have easy interaction. The modern list also
addressed 5000 list items threshold issues problem by automatically indexing. Modern SharePoint does
not have SharePoint ribbon so we miss some cool features that present in
classic SharePoint including save as template, export to excel etc. |
|
New feature |
Classic SharePoint also supports these modern services but
there are some limitation and configuration issues which are not in Modern
SharePoint case. |
Modern SharePoint comes with very cool features that easy to
configure and share data between these services including Flow, Forms,
PowerApps, PowerBI etc. with responsiveness. |
|
AlternateCSSUrl web property |
Supported |
Not supported |
|
Minimal Download Strategy (MDS) |
Supported |
Not supported |
|
Web part supports |
All SPFx web part is supported in Classic pages. |
We can’t use already created “classic” web parts on “modern”
pages but vice-versa are worked. |
|
Development Strategy |
For classic SharePoint
Microsoft give feature called SharePoint Add-in in the year 2013 for web part
creation. SharePoint add-in
requires a lot of infrastructure and efforts to create add-in more it comes
in two flavors: SharePoint-hosted and provider-hosted. SharePoint add-in runs
in an iframe. |
For modern SharePoint
pages, Microsoft gives feature called SharePoint Framework (SPFx) in the year
2016 for web part creation. SharePoint framework
relly on open source tooling which required fewer efforts. SharePoint framework
does not run in an iframe that’s why it capable of running in classic
SharePoint site pages also. |
|
Development Customizations |
Classic web parts
support JSLink for list/form customizations. Supports display
templates, master pages offer search result rendering customizations |
Modern web parts not
supported JSlink in list/form customization. Modern SharePoint
development is client side using JavaScript frameworks like Angular JS, React
JS, Node etc. all these open sources. SharePoint framework (SPFx)
are used to create modern web parts and extensions SPFx extensions can
help for Application Customizers, Field Customizers, and Command Sets. |
|
Tools for Development Customizations |
SharePoint Designer Infopath SharePoint Workflows Sandbox Solution CustomActions |
SharePoint
Framework(SPFx)- Web part and Extention PowerApps Microsoft Flow |
|
SharePoint Search |
The ”classic” search
experience can be found in SharePoint on-prem as well as in Office 365.
”Search Center” provides results from the search index. Full control on the
searchable strategy, define what results to be displayed with complete search
customization |
”Modern” search
experiences have been popping up in Office 365 only. Displaying relevant
content, moreover, suggesting what is supposed to be useful to the current
user but the modern search experience UI is not customizable. |
|
SharePoint Ribbon |
Present |
Not present |
Limitation
of Modern SharePoint:
- 1. Modern SharePoint has come for Office 365 online only. not for
on premises.
- 2.
For SharePoint Framework (SPFx) to build and deploy client-side
web part so you need Office 365 tenant admin permission to create an
app catalog site.
- 3.
No support for master pages and page layouts.
- 4.
No active SharePoint ribbon in modern SharePoint.
- 5.
Custom CSS via AlternateCSSUrl web property not supported
- 6.
Minimal Download Strategy (MDS) not supported
- 7.
Missing script editor and content editor web part.
Subscribe to:
Comments (Atom)